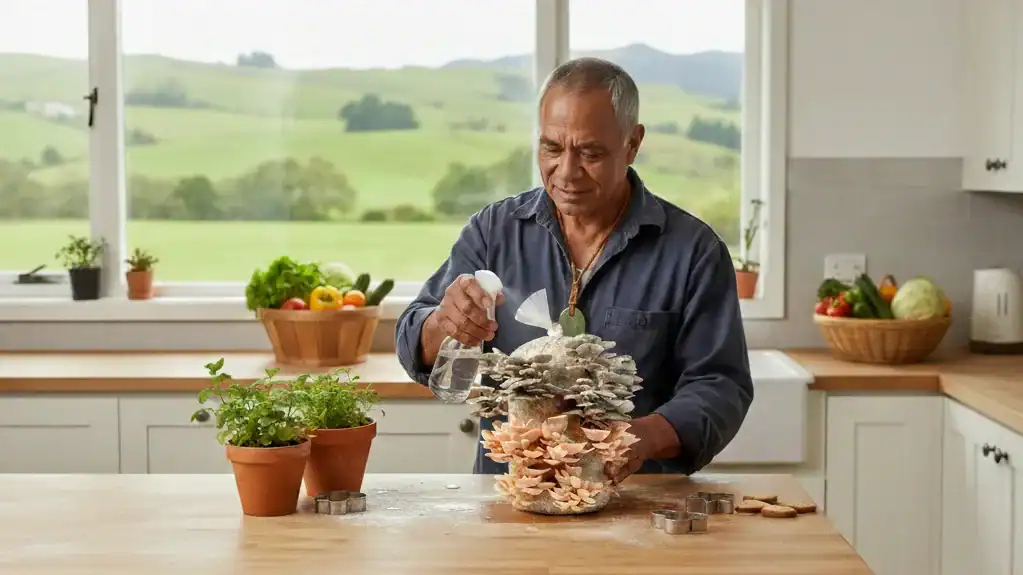
If you are growing one of our oyster mushroom grow kits (or not), understanding the stages of oyster mushroom development helps you know exactly what to expect — and when to act.
At Mycobio, we cultivate thousands of tonnes of oyster mushrooms every year, so the photos below reflect real growing conditions rather than idealised laboratory examples. Use this visual guide to confidently identify healthy growth, spot potential problems early, and harvest at the perfect moment.
The unique conditions of your mushroom ‘grow’ (usually in your home) will influence the speed and shape of your mushrooms as they develop. The following photos so how they should look like, and also some common problems.
👉 Learn more abou the best places in your home to grow
New to mushroom growing? Oyster mushrooms are one of the easiest and fastest species to grow at home — which is exactly why we recommend them for beginners.
👉 Want to know how to grow, or more about oyster mushrooms?
👉 Explore our ready-to-grow oyster mushroom kits and start harvesting in as little as 10–14 days.
1. Incubation stage
For the first few weeks (generally 2 in summer and up to 4 in winter), the mycelium of the mushroom is growing within the substrate. The substrate we use is a mixture of Pine sawdust and soy hulls. In essence, we have created a rotting log which is what the mushroom would be growing on in nature
You should notice the mycelium thickening and getting white within the bag.
Early Growth
 1")
 2")
 3")
 4")
2. The Pinning Stage
This is the stage where the mushrooms start to fruit. It’s called pinning because the little mushrooms sometimes look like little pinheads (called a pin set). Although, Oyster mushrooms often just looks like a blob (especially the pinks. At his stage, it’s essential to crank up the humidity. Ideally, it’ll be in the 90% relative humidity range. See our humidity tips page.
 5")
 6")
 7")
 8")
3. Mushroom growth after a few days
If all goes well, and you are providing good conditions, you should notice steady growth. For instance, if you check every 6 hours you should notice a difference. If the conditions are not good (and this is usually due to lack of humidity), it will stall.
 9")
 10")
 11")
 12")
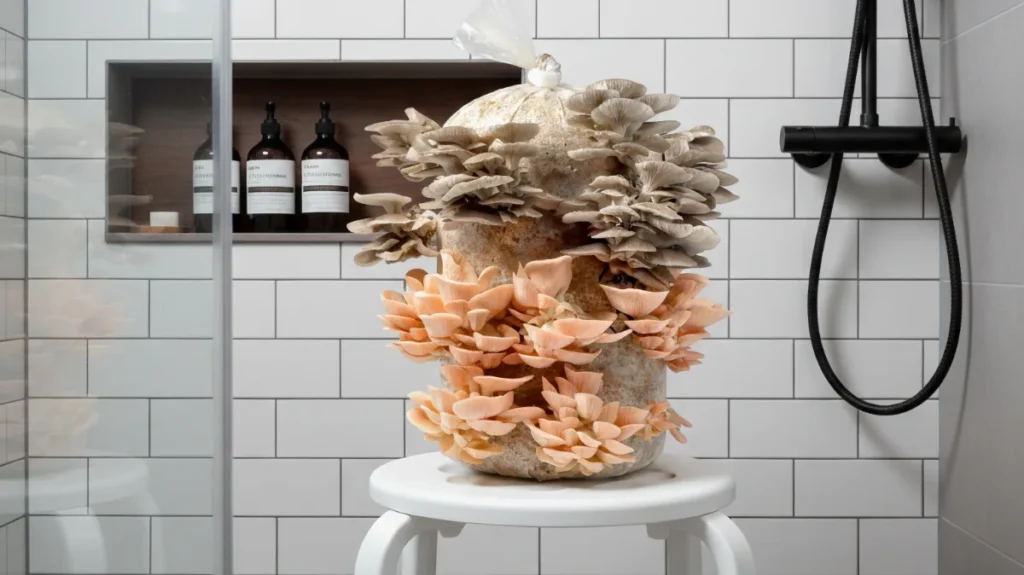
4. Mushroom harvest
The Greys are easier than the Pinks for observing the changes that are taking place that indicate that they are ready to harvest. The caps on the Greys will flatten out and may start to curl or rise up (into a more convex shape) exposing their gills. It’s at this stage they will drop their spore.
The Pinks will often grow with their gills fully exposed, so it’s difficult to see the change like the Greys. So for the pinks, if they have been steadily growing we recommend harvesting on day 5. Once you have had a successful harvest, you should know what to look for and perhaps time the harvest better for next time.
we recommend picking them before they spore but if they do, carefully wipe up the spore with a damp cloth and harvest. They are still good to eat.
 13")
 14")
 15")
 16")
7. Sporing
Sporing occurs when the mushrooms have reached full maturity (usually just after the 5th day of growth) and begin releasing microscopic spores into the air as part of their natural reproductive cycle. You may notice a fine white or pale dust settling on nearby surfaces or collecting around the base of the grow kit. This is completely normal and simply a sign that the mushrooms were left a little longer than ideal before harvesting.
While spored mushrooms are still perfectly safe to eat, their texture and flavour will begin to decline. For the best culinary quality, we recommend harvesting just before this stage — typically when the caps have flattened but before they start to curl upward.
If spores have already dropped, gently wipe the area with a damp cloth and harvest promptly. In enclosed spaces, heavy spore loads can occasionally irritate people with sensitivities, so good airflow is recommended during this stage.
👉 Has your mushrooms spored in the house? Learn what to do.
Things that can go wrong
👉 Learn how to fix the top 2 problems growing oyster mushrooms
a) Stalling
The number one thing that people contact us about, is the first harvest stalling. This is generally through a lack of humidity. Notice how the little pink pin-set has darkened (and will eventually turn black). If it stays this size and darkens, it’s stalled. Stalling is usually more of a problem with the Pink oyster mushrooms.
 17")
 18")
 19")
B) Dormancy
f your mushroom grow kit looks fully colonised (thick white mycelium) but hasn’t begun forming pins after about four weeks, it may have gone dormant — meaning it’s not triggered to fruit yet. This most commonly happens in the middle of summer or winter but can occur at any time.
Signs of dormancy:
- The substrate bag appears healthy and heavily colonised.
- You might see dark brown patches, often caused by “mycelium sweat” — not necessarily rot but a sign of stress.
 20")
c) Overdone (not harvested after 5 days)
Leaving the mushrooms growing for longer than 5 days means they are overdone. The flavour and quality will deteriorate quickly. You will also have a big spore mess to clean up. This can cause problems for people with allergies.
For the greys, notice how the edges have started to turn up exposing the gills.
The pinks are more difficult to tell as often grow with the gills exposed, some more care needs to be taken to harvest on day 5. The pinks will also deteriorate more quickly, they will start turning yellow and will give off a pungent smell.
 21")
d) Not enough air exchange.
If the mushrooms are grown in an enclosed space, they will grow long and leggy with undersized caps. This occurs due to a buildup of carbon dioxide (that the mushrooms exhale), so essentially stale air. The mushrooms will grow long stems trying to find better air. If this happens we often recommend cooking with them as you might with salt and pepper squid.
The stems in this example are thick, in some cases, they will be more skinny or wirery.
 22")
Growing oyster mushrooms is a fascinating journey, and once you’ve seen the full lifecycle unfold, you’ll begin to appreciate just how resilient and fast-growing these mushrooms can be when given the right conditions. Even experienced growers continue refining their approach over time, learning to recognise the subtle signals mushrooms provide throughout each stage.
If you’re ready to deepen your understanding or take the next step with confidence,
👉 Want to know which mushroom grow kits deliver the best results in New Zealand? This guide walks you through what separates a high-quality grow kit from the rest, helping you choose a kit that is reliable, productive, and suited to your growing environment.
Further Reading
- A Detailed Explanation of the Mushroom Life Cycle https://grocycle.com/mushroom-life-cycle/
- Six Steps to Mushroom Farming https://extension.psu.edu/six-steps-to-mushroom-farming